Make Your Own Accessories With Straw Weaving
SEPTEMBER 26TH, 2023
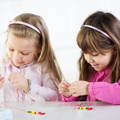
This fun craft project is a great way to bond with your daughter and create fun, unique accessories at the same time. Straw weaving allows your daughter to practice her fine motor and problem-solving skills while making her own cute bracelets, necklaces, or headbands. So what are you waiting for?! Grab these common household craft materials and start creating!

Here’s what you’ll need:

- Yarn
- 3 straws
- Scissors
- Tape
How To Make Your Accessories:
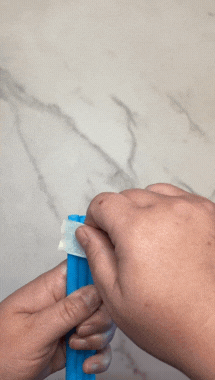
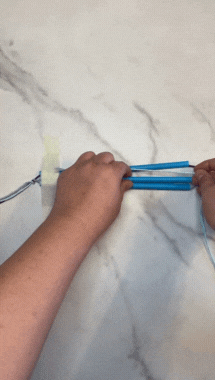
Step 1: Start by taping three straws together at one end.
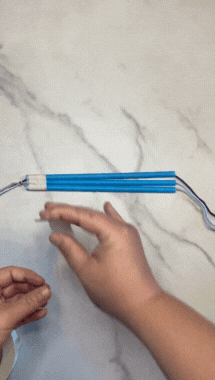
Step 2: Cut three pieces of yarn three times the length of your straws.

Step 3: Then thread one string of yarn through each straw. You can use a wooden skewer to help thread the yarn through if needed.

Step 4: Tie the yarn together at the tape side of your straws. Be sure to leave a few inches of yarn, enough to tie together when you finish.

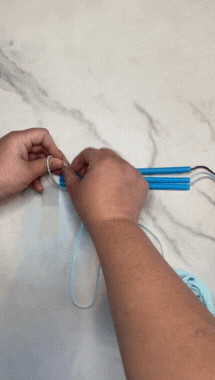
Step 5: Now tape the straws to a table or surface you would like to do your weaving at. This will keep it from moving around and will be easier once you begin weaving.
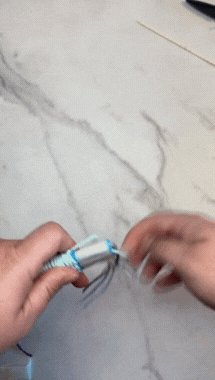
Step 6: Take a new piece of yarn and tie it around the top straw. I didn’t cut mine until the end.
Step 7: Now you are ready to weave! Take the yarn that you tied on the top straw and put it under the middle straw and over the bottom straw. (Tip: We pulled the extra yarn that we threaded through the straws so they were shorter and out of our way.)
Step 8: Wrap it under the bottom straw, over the middle straw, and under the top straw.

Step 9: Repeat the weaving pattern. After a few lines push the yarn up towards the tape, and pull everything tight. Continue weaving until you have reached the desired length for your project.

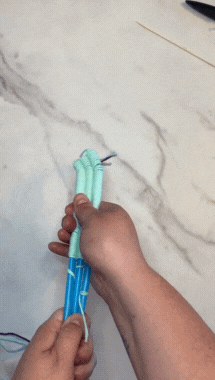
Step 10: When you have finished, tie a single knot around the straw you finished weaving on. This will help keep everything in place when you slide the weave off the straws.

Step 11: If you pulled the threaded yarn out of the straws as we did, rethread the yarn through the straws. Be sure the knot is on the tape side. Remove the tape off the table and straws.
Step 12: Slide your project off the straws toward the knot you tied at the beginning.
Step 13: Find the end of the yarn where you finished weaving. Tie it in another knot around the yarn it was woven around. You can now use a double knot.
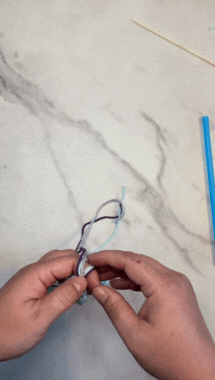
Finally, tie the ends together to make a bracelet, necklace, or headband. If your daughter is up for a challenge, have her create accessories that follow different patterns. These simple, DIY accessories could even be given as gifts to loved ones!